Wednesday, April 26, 2017

Thanks

The Project Bin is a stamp company that makes snappy Sentiments.  I was able to use the "Autumn's Calling" stamp set to create my project.  This stamp set comes with 9 stamps.


I used a die to cut out the frame. I used another die to cut out my pink cardstock scalloped oval.  I then used my Misti tool to line up the sentiment stamp and stamped it onto the cut out. I layered some teal CS  on top of my card base.  I then attached my matted sentiment. I then added some pearls. 

A closer peek at the sentiment:


Check out The Project Bin Blog for some more inspiration using "The Project Bin" sentiments....


Tuesday, April 25, 2017

Digi Choosday!!!

It's time for a new challenge over at the Polkadoodles Digi Choosday Challenges blog, the theme for the DT is Anything Goes but must use a design sheet, but you can enter an Anything Goes project.

I have created a card using a design sheet from the Horace and Boo - Big Kahuna Collection bundle. In this bundle you will get some black and white images, some colored images and some design sheets and sentiments.


Here's a closer look at some of the elements you get from the Horace and Boo design sheet:


Make sure you pop over to the Polkadoodles Digi Choosday Challenge Blog and check out the rest of the DT inspiration, we would love for you to join us for our Anything Goes challenge, you might lilke to join the DT and follow the optional Use a design sheet theme.  If you need some more inspiration you might like to take a look at our Facebook Page.

Thanks for stopping by today....


MHKD Sea Creatures

Hello, friends! Im here today to show you another New February Release for the MHKDesigns Etsy ShopToday we are featuring the "Sea Creatures" digital stamp set:


Take a peek at my creation...


I just love this image from the  Sea Creatures set!  I printed out my image and sentiment onto some white CS.  I used a Gina Marie die to cut out my image and sentiment. I used a larger die for the mat behind my image and sentiment.  I layered some purple, grey and blue CS on my card base.  I  used a die to cut the corner on the grey and blue. I then attached my matted image and sentiment.  I added some pearls and a bow to finish off my card. 

A closer peek at my colored image and sentiment:


What do you think of my creation?  I would love to hear your thoughts in the comments below!

Thanks for stopping by today, friends!  I will be back soon with another creation using products from the MHKDesigns Etsy shop!  Until tomorrow, HUGS and happy stamping! :)


Monday, April 24, 2017

MHKDesigner Inspiration

Hello friends!

I'm here on this fabulous Monday with my Designer Inspiration for MHKDesigns digital stamps and papers.  Here is my card for today!

Both the image and sentiment is from the "Birdcage Silhouettes" stamp set. 


A closer peek at my image and sentiment:

I hope you enjoy!  I had a lot of fun creating. Don't forget to link up to our current  MHKDesigns challenge too! :)

Until next time,


Digital Delights Hostess Monday


Happy Monday Everyone !!!

This week is my turn to share with you. I chose to use "Dolly Bunny" and "Easter Sentiments".  It is just one of many images available at Digital Delights!


I chose to make a Criss Cross Card!!


  Here are the directions on how to make it. 

Step 1 - cut 2 pieces of cardstock to 6" x 12".  Score both of them at 6".


Step 2 - Take one of the scored pieces and cut it diagonally from the center top to the bottom right.  Take the other piece and cut it diagonally from the center top to the bottom right.


Step 3 - Add adhesive to the rectangle back of one of the pieces. 

Step 4 - Tape both pieces together, making sure both of the long edges of the diagonal is on the bottom.  


Step 5 - Let's decorate our card base. Take some patterned paper that are 5 3/4" and another piece that is 5 1/2" and cut them in half diagonally.


Step 6 -  Adhere the pieces together to form a layered look.  Adhere them to the card front. 


Step 7 - Add tape to the bottom of the middle panel and tape one side  down. 


Step 8 - Add tape to the bottom of the triangle that will be on top of the card.  Tape the triangle down. 


Step 9 - Cut pieces for the insert.  I cut mine to 5 1/2" x 5 1/2".  I layered a piece of cardstock on top of the insert base that was 5" x 5".  


Step 10 - I attached some ribbon through the hole in the insert. 


Step 11 - insert the insert into the card base. 


Step 12 - Decorate the card as you please...... I used a colored image of "Dolly Bunny" cut out with a die and matted for my main focal image. I also added a sentiment on the insert at the top under the ribbon.


A closer peek at the colored image and the sentiment:


You can find all of Wendy's cute digital images HERE. I love them all. 

Thank You for stopping by !!!!


Thursday, April 20, 2017

Delightful Thursday at Digital Delights.....

Hello...
 
It's Delightful Thursday again over at Digital Delights Blog and time for team 1 to share some inspiration using Wendy's adorable  Digital Delights images.
For my card share today, I have used the adorable Beatrice Bee available HERE 


Items used:
Digital Delights Beatrice Bee -  coloured with copics
    C9,  Y15, Y13, Y17, R37, R35, R32
White, Yellow and Black CS from my stash
Spellbinders
 dies
Ribbon from my stash

A closer peek at my colored image:


For lots more fabulous inspiration pop over to the Digital Delights blog HERE to see what the rest of the DT have created, they are all such gorgeous makes :)
Thanks for stopping by


Sheepski Designs

I'm excited to show you my creation for Sheepski Designs.  This is another post using one of their wonderful images called "Faye". 


Items Used:
Copics: E11, E00, E000, R20, E37, E35, E33, E31, R08, R05, R02, V25, V22, V20, E44, E42, E40
 Brown, Purple and Red CS from my stash
Gina Marie Designs Dies
Border Punch
Pearls

A closer peek at my colored image:


As a surprise I have a promo code for you to use at the SheekSki Design Etsy shop.  You will get 10% off your images using the code : SKIDAWN10

Check out our Facebook page for some more inspiration using Sheepski Design images.


MHKD Funky Flowers

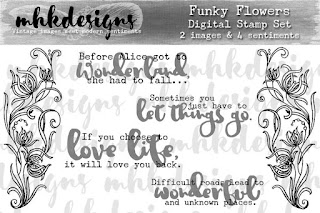
Hello, friends! Im here today to show you another New February Release for the MHKDesigns Etsy ShopToday we are featuring the "Funky Flowers" digital stamp set:


Take a peek at my creation...


I just love this image from the  Funky FLowers set!  I printed out my image onto some pinkish colored CS. I printed out my sentiment onto some white CS. Both were cut out using Gina Marie dies.  I used a larger die for the mat behind my image and for the sentiment.  I layered some dark blue and off white CS on my card base. I added some ribbon to the bottom of my card base. I then attached my matted image and my matted sentiment.  I added some pearls and a bow to finish off my card. 

A closer peek at my colored image and sentiment:


What do you think of my creation?  I would love to hear your thoughts in the comments below!


Thanks for stopping by today, friends!  I will be back soon with another creation using products from the MHKDesigns Etsy shop!  Until tomorrow, HUGS and happy stamping! :)


Wednesday, April 19, 2017

Someone I Love.....

The Project Bin is a stamp company that makes snappy Sentiments.  I was able to use the "Born Yesterday" stamp set to create my project.  This stamp set comes with 7 stamps.


I used a die to cut out the scalloped square mat for my sentiment.  I used another die to cut out my white cardstock scalloped square.  I then used my Misti tool to line up the sentiment stamp and stamped it onto the cut out. I layered some teal CS and some designer CS on top of my card base.  I then added some ribbon and a bow. I then attached my matted sentiment. I then added some pearls. 

A closer peek at the sentiment:


Check out The Project Bin Blog for some more inspiration using "The Project Bin" sentiments....


Scrap N Dipity Spotlight

For my Spotlight post I decided to use "Happy Birthday Bear".


I printed out my digital image onto some cryogen cardstock and colored the bear in using copics.  Copic colors used E37, E35, E33, E31, Y17, Y15, Y13, YR18, YR16, YR14, R20.  I made my card base 6x6.  I layered some orange CS and designer CS on top of my base.  I used a die to cut out my colored image and for the mat behind it.  I added some ribbon. I attached my matted image onto my card front. I then added the bow to the card front. 

Here's a closer peek at my colored image:


Don't forget to join us each month for our monthly challenges, you can find this month's
challenge HERE!!!